 how-to
How Long Does Fence Installation Take? Timeline
Table of Contents
- Fence Installation Timeline: From Permit to Final Post
- Day-by-Day Fence Installation Breakdown
- How the Fence Installation Permit Process Adds Time
- How Deep Should Fence Posts Be Buried for Stability
- How Long for Concrete to Cure for Fence Posts
- Weather, Soil, and Other Factors That Delay the Job
- Professional Crew vs. DIY Timeline
- Plan Your Fence Project with Confidence
- Frequently Asked Questions
Last Updated: September 9, 2026
Most homeowners assume fence installation takes a single weekend. The reality is that the total project timeline, from signing a contract to the final gate latch, usually spans one to three weeks. The actual on-site labor is often just two to three days, but the fence installation process is governed by permit approvals, utility line marking, and material delivery, which add unexpected days to the calendar. This guide breaks down the full timeline so you can plan accurately, whether you are installing vinyl, wood, chain link, or iron.
Understanding the difference between "labor hours" and "total project lead time" is the single most important planning step. You might have a crew on-site for only 16 hours, but if the city requires a 10-day permit review, your fence will not be ready by Saturday. The sections below cover the day-by-day build, the permit process, post depth, concrete curing, and the delays that push projects past their estimates.
Fence Installation Timeline: From Permit to Final Post
A typical residential fence installation takes one to three weeks from start to finish, with two to three days of active on-site labor for a standard home. This timeline assumes a straightforward layout, average soil conditions, and a permit process that moves without complications.
The gap between the labor estimate and the total timeline comes down to administrative steps. Permit acquisition alone can take several business days, and utility marking is legally required before any digging begins. Material lead time also plays a role; standard vinyl and wood panels are usually in stock, but custom ornamental metal or specific colors can delay delivery by a week or more.
Here is how the phases stack up for a typical project:
| Project Phase | Typical Duration | Notes |
|---|---|---|
| Permit application and approval | 3-10 business days | Varies by local municipality |
| Utility line marking | 2-3 business days | Required before digging |
| Material delivery | 3-7 days | Longer for custom orders |
| Site prep and layout | 4-8 hours | Day 1 |
| Digging and setting posts | 6-10 hours | Day 2 |
| Rails, panels, and gates | 6-10 hours | Day 3 |
| Concrete curing | 24-48 hours | Before attaching panels |
Planning for the full three weeks eliminates the stress of a missed deadline. If you are selling a home or moving on a fixed date, start the permit process as early as possible.
Day-by-Day Fence Installation Breakdown
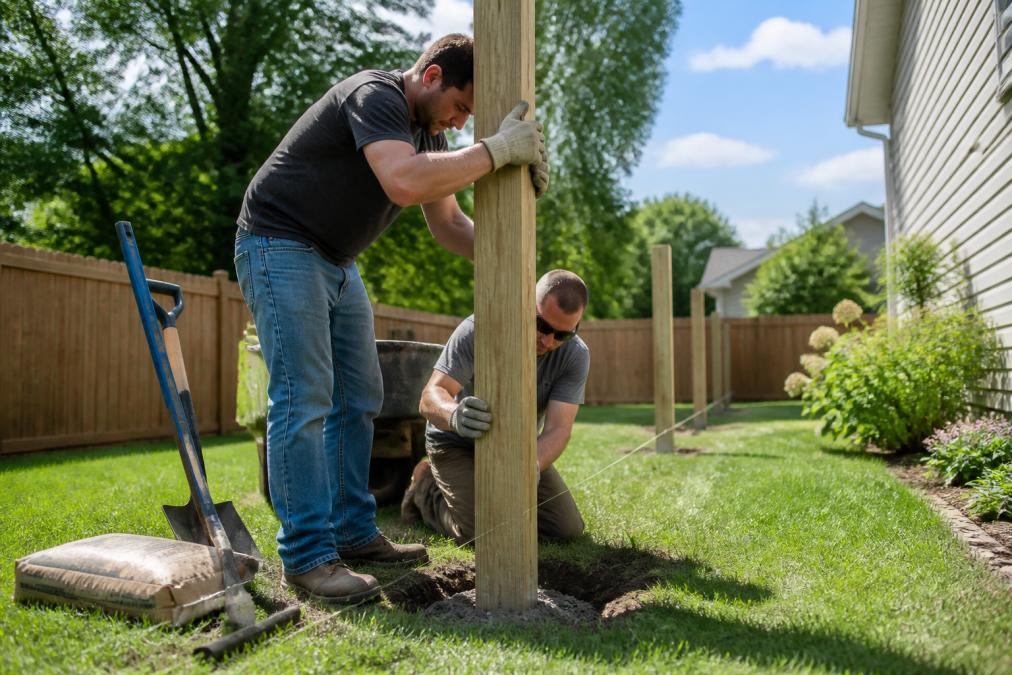
The physical construction of a fence for a standard home typically takes three days with a professional crew. This pace assumes a crew of two to three people, clear access to the property line, and no unexpected obstructions like buried sprinkler lines or large rocks.
Day 1: Site Prep and Layout
The first day focuses on marking the fence layout and preparing the ground. The crew walks the property line, confirms the survey stakes, and marks every post location. They clear grass, weeds, and debris along the fence line, and they flag any underground obstacles.
This is also when the crew verifies the digging depth and checks the slope of the terrain. A steep slope requires stepped panels or custom racking, which adds time to the schedule. Day 1 typically ends with all post holes either marked or partially dug, depending on soil conditions.
Day 2: Digging and Setting Posts
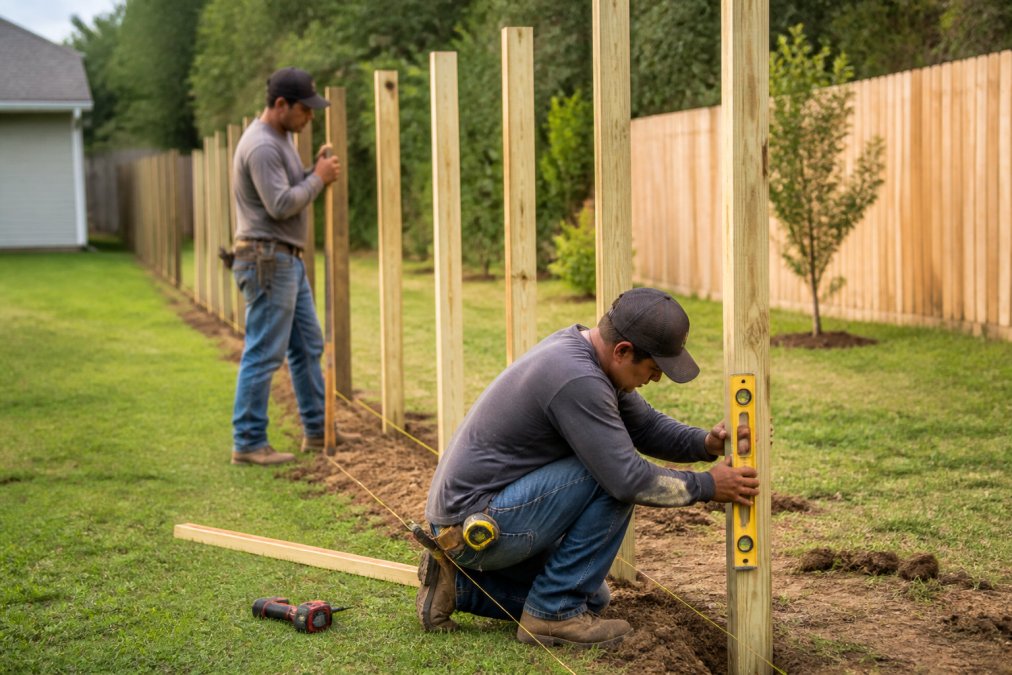
Day 2 is the most physically demanding. The crew digs every post hole to the required depth, typically one-third of the post height above ground. They set each post in the hole, check it with a level, and pour concrete around the base.
Setting posts is precise work. A post that is off by even a degree will cause panel gaps and gate alignment issues later. Most crews set all posts on Day 2 and let the concrete begin curing overnight.
Day 3: Rails, Panels, and Gates
The final day of labor involves attaching horizontal rails, hanging panels, and installing gates. For wood fences, the crew nails or screws pickets to the rails. For vinyl and chain link, they connect pre-fabricated panels. Gate installation is the most detailed step, as the hinges and latch must align perfectly to prevent sagging.
By the end of Day 3, the fence is standing and functional. The concrete around the posts may still be curing, so the crew will advise you to avoid leaning heavy objects against the posts for another 24 hours.
How the Fence Installation Permit Process Adds Time
The fence installation permit process is the most common source of timeline delays, and it is often overlooked in online estimates. Most municipalities require a permit for any fence over a certain height, typically four to six feet for side and rear yards. The official guidance on residential fencing permits explains that local zoning ordinances dictate where fences can be placed and how tall they can be.
The permit process involves submitting a site plan, paying a fee, and waiting for review. Review times range from a few days to two weeks, depending on the city's workload. Some municipalities allow same-day over-the-counter permits for simple projects, while others require a full plan review by a zoning officer.
Homeowners associations add another layer. If your property is in an HOA, you must submit a separate architectural review application before the city permit. HOA approval timelines vary widely, but they commonly add one to two weeks to the front end of the project.
How Deep Should Fence Posts Be Buried for Stability
Fence posts should be buried to a depth of at least one-third of the total post height, with a common rule of thumb being two feet for a six-foot fence (iowadot.gov). This depth ensures the post is anchored below the frost line in most climates and provides enough lateral resistance to withstand wind pressure.
The standard formula is straightforward: for a fence post that extends six feet above ground, dig a hole two feet deep. For taller privacy fences or areas with high wind exposure, increase the depth to 30 or 36 inches. The hole width should be roughly three times the post diameter to allow for adequate concrete coverage.
Soil conditions dictate whether you need extra depth. Sandy or loose soil offers less holding power, so posts should be set deeper and with a wider concrete base. Clay soil holds posts firmly but drains poorly, which can lead to rot at the base of wood posts over time. If you are unsure about your soil type, a quick percolation test or a conversation with a local contractor will settle the question.
How Long for Concrete to Cure for Fence Posts
Concrete for fence posts typically needs 24 to 48 hours to cure before you attach rails and panels, though full structural strength develops over several days. The curing process is a chemical reaction that requires moisture, so hot, dry weather can slow it down if the concrete is not kept damp.
Most professional crews use fast-setting concrete mix designed for post setting. This type of mix can support weight within 20 to 40 minutes and reach sufficient strength for panel attachment within 24 hours. Standard concrete mix requires a full 48 hours before you should stress the posts.
Weather plays a major role in curing time. In temperatures below 50 degrees Fahrenheit, the chemical reaction slows significantly, and curing can take up to 72 hours. In freezing conditions, concrete may not cure at all without additives. Plan your installation around moderate weather to keep the timeline predictable.
Weather, Soil, and Other Factors That Delay the Job
Weather is the most unpredictable variable in the fence installation timeline. Rain turns bare soil into mud, which makes digging difficult and compromises the concrete mix. Most professional crews will not set posts in heavy rain because water in the hole dilutes the concrete and weakens the bond.
Frozen ground is another major delay. Digging through frost requires specialized equipment and can add hours to the project. Scheduling installation in late spring or early fall, when the ground is soft and temperatures are moderate, is the most reliable way to avoid weather-related delays.
Soil conditions and terrain slope also affect the timeline. Rocky soil can slow digging by several hours, and crews may need to rent a powered auger or jackhammer. A steep slope requires stepped panels or custom fabrication, which adds both labor time and material cost.
Utility line marking is a delay that catches many homeowners off guard. You must call the local utility locating service at least two to three business days before digging. The service marks underground gas, electric, and water lines with colored paint, and digging before the marks are in place is both dangerous and illegal. The national call-before-you-dig hotline information explains how to request marking in your area.
Professional Crew vs. DIY Timeline
A professional crew installs a standard residential fence in two to three days, while a DIY installation typically takes one to two weekends of work. The difference is not just speed; it is also the quality of the result and the hidden time costs of DIY.
DIY projects require you to rent equipment, haul materials, and learn the techniques as you go. Digging 20 to 30 post holes by hand is a full day of labor on its own. Setting posts, mixing concrete, and ensuring each post is perfectly plumb takes another day. Attaching panels and installing gates usually requires a third day of work.
The hidden cost of DIY is mistakes. A post set at the wrong angle, a gate that sags, or a panel that is not level will require rework that eats into your weekends. Professional crews have the experience to handle slopes, soil variations, and gate alignment issues on the first pass.
For most homeowners, the value of a professional crew is the guarantee of a straight, durable fence without the physical toll. A family-owned company that does not subcontract the work keeps the same crew on-site from start to finish, which ensures consistent quality and secure job sites.
Plan Your Fence Project with Confidence
The key to a stress-free fence installation is building buffer time into your schedule. Expect the full process, from permit to final post, to take one to three weeks, even though the physical labor is only two to three days. Start the permit and utility marking process early, and schedule your installation during moderate weather to avoid the most common delays.
A professional installation crew handles the details that cause timeline overruns. They know the local permit requirements, they check soil conditions before digging, and they wait for concrete to cure before attaching panels. This expertise is why a professional fence installation lasts for decades without leaning posts or sagging gates.
Fence Company Lincoln brings over 30 years of construction experience to every residential and commercial project. As a family-owned and operated business, we manage every project from design to completion without subcontractors, so you know exactly who is on your property. Our fully licensed, insured, and bonded team installs vinyl, wood, chain link, and iron fencing with high-quality craftsmanship.
Get started with Fence Company Lincoln and secure your property with a fence that stands the test of time. Contact us today for a consultation and a project timeline tailored to your property.
Frequently Asked Questions
Can you install a fence in one day?
A simple, short run of fence on flat ground with no gates can sometimes be completed in a single day by a professional crew. However, most residential fence installation projects take two to three days of on-site work. The total timeline stretches longer when you add permit approval, utility line marking, and concrete curing time. A standard 150-foot privacy fence usually needs at least two full days for digging, setting posts, and attaching panels. Plan for three days to allow for weather delays or unexpected soil conditions.
How long after digging post holes can you pour concrete?
You can pour concrete immediately after digging the post hole if the soil is stable and free of standing water. The more important timeline is the curing time after the concrete is poured. Fence posts set in concrete need at least 24 to 48 hours to cure before you attach rails or panels. Cold or wet weather extends that curing period. The concrete must reach sufficient strength to hold the posts plumb and stable while you continue with the rest of the fence installation.
Does weather affect fence installation time?
Weather is one of the biggest variables in any fence installation timeline. Rain delays digging because wet soil is heavy and unstable, and it can compromise the concrete mix if water pools in the post holes. Frozen ground in winter makes excavation difficult or impossible for most residential crews. High winds can make handling large panels unsafe. Most contractors build in one to two buffer days for weather when they schedule a project. Summer and early fall typically offer the most predictable conditions for staying on schedule.
How deep should fence posts be buried for a 6-foot fence?
For a standard 6-foot privacy fence, posts should be buried at least 24 to 30 inches deep. A common rule is to set one-third of the post height into the ground. The hole should be about three times the width of the post to allow room for concrete. Local building codes may specify a different depth based on frost lines in your area. Deeper burial is required for gate posts, which carry extra weight and movement. Soil conditions also matter; sandy or loose soil needs deeper posts for the same stability.