 how-to
Fix a Sagging Gate That Won't Latch: Step-by-Step Guide
Table of Contents
- Diagnose Why Your Gate Is Sagging and Won't Latch
- Tools You'll Need to Fix a Sagging Gate
- Step 1: Tighten Loose Hardware on the Gate Frame
- Step 2: How to Adjust Gate Hinges for Proper Alignment
- Step 3: Install an Anti Sag Gate Kit with a Turnbuckle
- Step 4: Fix a Dropped Gate by Adding a Diagonal Brace
- Step 5: Check the Fence Post for Movement or Rot
- Does Homeowners Insurance Cover Fence Repair?
- Frequently Asked Questions
Last Updated: September 6, 2026
A gate that drags, sticks, or refuses to latch is a frustrating fence problem. A sagging gate is rarely a fault of the latch itself; it is almost always a structural issue where the weight of the gate has overcome its frame, hinges, or supporting post. This guide from Fence Company Lincoln walks you through the diagnostic steps and repair methods to fix a sagging gate that won't latch, from hinge adjustments to an anti-sag kit, and helps you decide when to call a professional.
Diagnose Why Your Gate Is Sagging and Won't Latch
Before picking up any tools, identify the root cause of the sag. A sagging gate is a symptom, and treating the wrong cause wastes time and money. Start by examining the gap between the gate and the latch strike plate; if the gate drops on the hinge side, the top corner will sit lower than the strike plate, causing the latch to miss its mark.
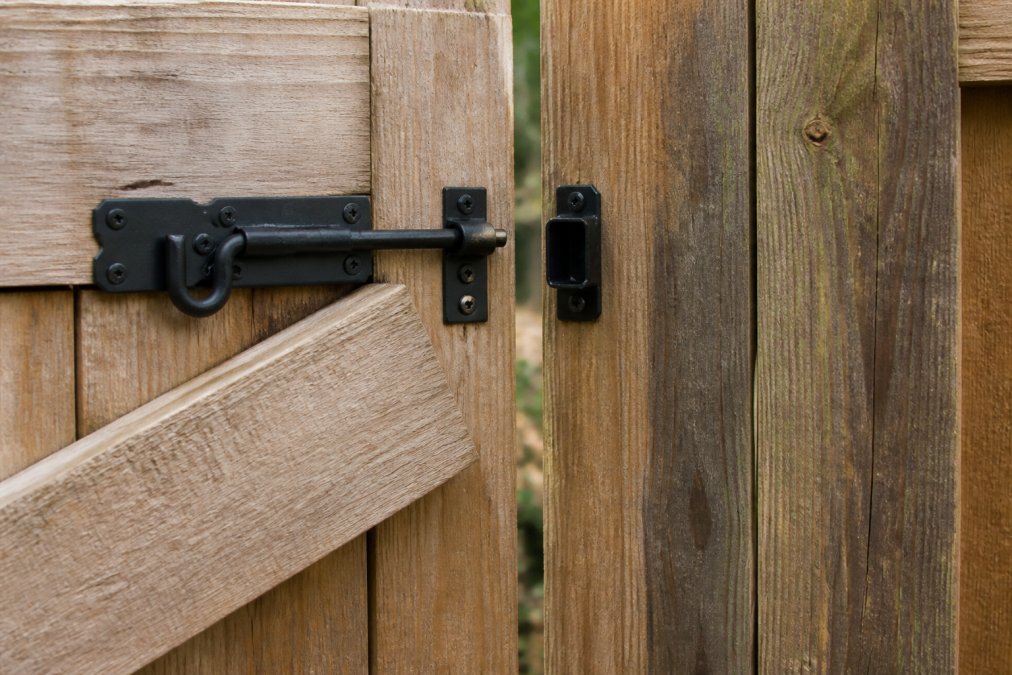
Check the three most common failure points in this order. First, look at the hinge screws; loose or stripped screws will let the gate droop. Second, examine the gate frame; a frame no longer square, often due to a missing or failed diagonal brace, will twist under its own weight. Third, inspect the fence post; if it leans or moves when you lift the gate, you have a foundation problem. The fix depends on which of these three areas is failing.
Tools You'll Need to Fix a Sagging Gate
Gather the right tools before you start, since most repairs take under an hour. For basic hardware tightening and hinge work, you will need a drill or impact driver, a screwdriver set, and a socket wrench or crescent wrench. A level is essential for checking both the gate and the post. For structural fixes, add a saw, galvanized or zinc-plated wood screws, and lumber for a diagonal brace if you are not using a kit.
The type of fastener matters more than most DIY guides admit. Standard screws on outdoor gates lead to rapid corrosion and failure, so choose zinc-plated hardware or stainless steel. An anti-sag gate kit typically includes a turnbuckle, a tension cable, and mounting brackets for wood or metal posts. A common mistake is buying a kit rated for a lighter gate than you own, so check the weight capacity on the package before purchasing.
Step 1: Tighten Loose Hardware on the Gate Frame
Start with the simplest fix: tighten every screw and bolt on the gate. Loose mounting screws are the leading cause of a gate that drops, because the frame shifts on its fasteners each time it swings. Use an impact driver to tighten hinge screws firmly, but stop before you strip the heads. If a screw spins freely, the wood has stripped and the hole needs a larger screw or a shim.
For stripped holes, remove the screw and insert a wooden shim coated in exterior wood glue. Break the shim off flush, then drive the screw back in. This restores the grip of the fastener far better than moving the hinge. After tightening, test the gate. If it still sags, the problem is not loose hardware but a geometric issue with the frame or post alignment.
Step 2: How to Adjust Gate Hinges for Proper Alignment
If tightening does not fix the sag, the hinges may need adjustment. Gate hinges on wood posts often have slotted holes that allow for small vertical and horizontal shifts. Loosen the hinge screws on the post side, lift the gate to close the gap at the latch, and hold it with a shim or a helper while you retighten. This corrects minor misalignments of a half-inch or less.
For metal gates with welded hinges, adjustment is not possible, and the issue lies elsewhere in the frame. For wood gates, add a hinge shim behind the hinge leaf to push the gate away from the post, changing the pivot point and closing a gap. Check the clearance between the gate and the ground after any hinge adjustment; you want roughly 1 to 2 inches to prevent dragging as the gate swells with humidity.
Step 3: Install an Anti Sag Gate Kit with a Turnbuckle
For gates that continue to droop after hinges are tight and adjusted, an anti sag gate kit is the most reliable permanent fix for wood and vinyl frames. The kit uses a steel tension cable running diagonally from the bottom hinge corner to the top latch corner, with a turnbuckle in the middle to tighten it. The cable creates a rigid triangle that resists the racking force that causes the gate to drop.
Choosing the Right Kit: Weight Ratings Matter
The most common DIY failure is buying a kit rated for a lighter gate than you own. Standard residential kits from brands like Everbilt or National Hardware are typically rated for gates up to 150 pounds (homedepot.com). Heavy-duty kits, often using a thicker 7x19 galvanized cable and reinforced brackets, handle up to 300 pounds. Before purchasing, weigh your gate: a solid 4-foot-wide, 6-foot-tall cedar gate easily exceeds 100 pounds when wet. If your gate is over 200 pounds, skip the cable kit and move to the rigid diagonal brace in Step 4, as a cable will stretch over time under excessive load.
Installation Sequence for a Square Result
To install, mount the cable brackets at opposite corners of the gate frame, the bottom hinge side and the top latch side. Use the included lag screws or carriage bolts; for wood frames, pre-drill pilot holes to prevent splitting. Attach the turnbuckle and cable, then tighten it evenly in half-turn increments. As you tension, watch the top edge with a level; the goal is to lift the latch corner until the top edge is level, not to over-tighten, which can bow the frame inward. A common mistake is installing the cable on the same diagonal as the sag; it must run from the bottom hinge corner up to the top latch corner.
When a Cable Kit Fails: Vinyl and Hollow Frames
On hollow vinyl gates, the brackets often pull through the thin skin. Use brackets that bolt through the frame with a backing plate, or fill the hollow section with a pressure-treated wood insert before mounting. If the frame is already twisted or the joints are loose, the cable will only pull the corners together, not fix the internal racking; rebuild the frame's squareness first. After tensioning, re-check the latch alignment. If the gate closes but the latch is off by a quarter-inch or less, loosen the strike plate screws and shift it slightly to meet the latch bolt.
Step 4: Fix a Dropped Gate by Adding a Diagonal Brace
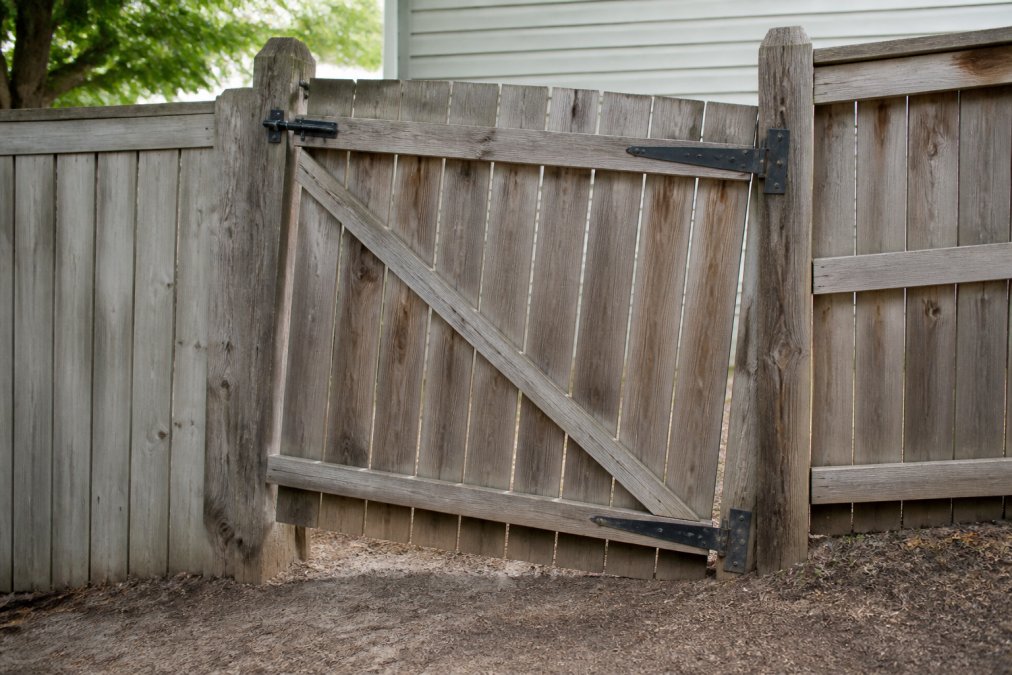
A rigid diagonal brace is the traditional and strongest solution for a dropped gate. The brace runs from the bottom hinge corner to the top latch corner, opposite to the direction of the sag. When the gate drops, the top latch corner falls, so the brace must push that corner back up.
Cut a piece of pressure-treated lumber to fit between the two corners, and secure it with galvanized screws at both ends. The key is to cut the brace slightly long so it pushes the gate back into square as you fasten it. A common mistake is installing the brace on the wrong diagonal, which makes the sag worse; remember the brace must rise from the hinge side to the latch side. After installation, re-check the latch alignment and adjust the strike plate if necessary.
Step 5: Check the Fence Post for Movement or Rot
If the gate is still sagging after every frame and hinge fix, the problem is not the gate but the fence post supporting it. A post that has shifted, rotted at the base, or was not set deep enough will lean under the gate's weight, pulling the assembly out of alignment. Grasp the post firmly and try to rock it; any movement at the base indicates a foundation failure that no amount of gate hardware will solve.
Material-Specific Post Failure Signs
Wood posts fail first at the ground line, where moisture and insects attack. Probe the base with a screwdriver; if it sinks in more than a quarter-inch, the wood is compromised. Look for a dark, spongy ring around the base, a sign of internal rot. Steel posts rarely rot, but they fail at the weld point where the hinge bracket attaches, or they corrode from the inside out; check for rust bubbles or flaking paint near the base. Vinyl posts can crack or become brittle from UV exposure, especially where they emerge from concrete; a hairline crack here will widen under the gate's weight.
The Concrete Footer Test
For a wood post that still feels solid, the issue may be a shallow concrete footer. A standard fence post should be set in a hole that is one-third the post's above-ground height, with a minimum of 24 inches of concrete below the frost line. If the post rocks but the concrete is intact, the footer is too small. You can sometimes brace it by digging a wider collar around the existing concrete and adding fresh concrete, but this is temporary. The proper repair is to remove the post and footer entirely, then set a new post with a 10-inch diameter hole filled with 80-pound bags of fast-setting concrete, typically two bags per post for a 6-foot fence.
Preventative Maintenance: The 6-Month Gate Check
A sagging gate is almost always a slow failure you can catch early. Twice a year, once in spring and once in fall, spend five minutes on this check (familyhandyman.com). First, open the gate halfway and lift up on the latch corner; if you feel any vertical play, the hinges or frame are starting to shift. Second, look at the gap between the gate and the post on the hinge side; it should be even from top to bottom, and a wider gap at the bottom means the gate is already dropping. Third, spray the hinges and turnbuckle with a silicone-based lubricant. Finally, check the post for any lean using a 4-foot level. Catching a quarter-inch of movement now prevents a full post replacement later.
When to Replace the Post vs. the Gate
If the post is rotted below the ground line, replacement is the only option. This is the most labor-intensive repair and often the point where homeowners call a professional. When you replace the post, inspect the gate's hinge brackets for wear. If the gate itself is square and the wood is sound, you can reuse it. If the frame has been racked for months, the joints may have loosened permanently, and a new post will just transfer the stress to the old frame; in that case, budget for a new gate panel as well.
Does Homeowners Insurance Cover Fence Repair?
A common question when facing a significant gate or fence repair is whether insurance will pay for it. Standard homeowners insurance policies typically cover fence damage caused by sudden, accidental events like a fallen tree, a vehicle collision, or severe storm winds (iii.org). Gradual wear and tear, rot, and sagging from age are almost universally excluded, since insurers consider routine maintenance the homeowner's responsibility.
The distinction matters for your sagging gate. If a storm knocked a branch onto your fence and bent the gate frame, you likely have a claim. If the gate simply sagged over years of use, you are looking at a maintenance expense. Check your specific policy and speak with your agent, as coverage details vary by carrier and state. For repairs outside insurance, a professional assessment can tell you whether a repair is cost-effective or if a replacement gate is the better long-term investment.
A sagging gate is more than an eyesore; it is a security gap and a sign of structural stress that will only worsen. Fence Company Lincoln has over 30 years of experience repairing gates and fences across residential and commercial properties, working with wood, vinyl, chain link, and iron. Our family-owned team manages every repair from diagnosis to completion without subcontractors, and we back our work with a price matching policy against competitors. Get started with Fence Company Lincoln and have a gate that swings freely and latches securely.
Frequently Asked Questions
What is the best way to fix a sagging gate?
The best fix depends on the cause. First, tighten all loose hinge screws and mounting hardware. If the gate still drags, adjust the hinges to shift the gate's weight. For a permanent solution, install an anti-sag gate kit with a turnbuckle and tension cable, or add a diagonal brace from the bottom hinge side to the top latch side. These methods realign the gate frame and restore proper clearance for the latch.
Can I fix a sagging gate without replacing the whole thing?
Yes, in most cases you can repair a sagging gate without a full replacement. Start by checking for loose fasteners and post rot. Tightening screws, adjusting hinges, or installing an anti-sag gate kit often solves the problem. If the gate frame is warped or the wood is rotting, you may need to replace individual boards or the gate itself, but the fence posts usually can stay.
How do I adjust gate hinges to fix alignment?
To adjust gate hinges, first support the gate with a level or a pry bar to take its weight off the hinges. Loosen the mounting screws on the hinge attached to the post. Move the gate up or down and side to side until it is level and the latch aligns with the strike plate. Tighten the screws and test the swing. For heavy gates, use a shim behind the hinge to change its angle.
Does homeowners insurance cover fence repair?
Homeowners insurance typically covers fence repair if the damage is caused by a covered peril, such as a fallen tree, a vehicle accident, or certain severe weather events like a tornado. Damage from gradual wear and tear, rot, or poor maintenance is generally not covered. Check your specific policy for details on coverage limits and deductibles. If the sagging is due to an uncovered cause, you'll pay for the repair yourself.